Saturday, September 21, 2013

Scrappin' up a stack!

Well, I am officially feeling "scrapped out".   I've been working on designing the (6) 2 page, 12x12 layouts for my first ever "scrap-a-stack" happening next week.  The participants will each make 6 layouts at this class -- great way to get a substantial start on your scrap books, if you haven't started yet, OR add some interest and variety to your current books.

For these layouts, part of my goal, was to use up a bunch of retired DSP I am inundated with, so some oldies but goodies are having a chance at another debut! :)

Layout #1: a direct CASE from one I saw made by Kay Kalthoff on Pinterest.  Features the Beautiful Butterflies SU Bigz die, the Top Note die, Tasteful Trim die, butterfly punches, and the Flowering Flourishes stamp set.


Layout #2: "Ok, Smile!" -- Spice Cake DSP -- combining More Mustard and Pool Party.  Seems like an odd combo, but isn't it stunning?!  That gorgeous medallion is from the Daydream Medallion stamp set and its matching framelits.  This layout came from an idea I saw in a CTMH catalog.  These silver flourish frames (framing the title) are in the SU Clearance rack right now -- $2.79 for a set of 8!


Layout #3: "Sweet, sweet moments" This layout idea was shared with me by my friend, Leah, when I was feeling completely out of scrappin' Mojo.  I don't know where she got the idea, but isn't it neat?  The papers I used here are from the "Mocha Morning" specialty DSP pack.  Also featured, is the Flower Shop stamp set and matching punch, and

Layout #4: Thankful for you!  I used the new Expression Thinlets from the new Holiday catalog for the "thankful" word -- cutting it out of the champagne glitter paper.  So stunning!  This layout idea was taken from another of Kay Kalthoff's layouts that I saw on Pinterest -- she did a Halloween one for hers.  Also featured, in this layout: Bitty butterfly punch and larger butterfly punch, the swirl stamp from the "Everything Eleanor" stamp set, Oval Accents Bigz die, the Deco Labels framelits, retired lace border punch, and the Round Array stamp set and 7/8" scallop punch.


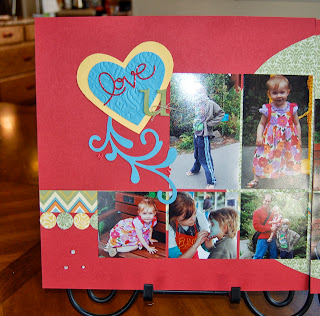
Layout #5: Love U!  featuring the Expression Thinlets dies again for the word "Love" -- cut out of the red glitter paper.  Very simple layout I took from a sketch I saw somewhere.  Also featured: Hearts framelits, Chalk Talk framelits, 3/4" circle punch, and the Beautifully Baroque embossing folder.


Layout #6: "Owl Always Love You".  This layout features a darling little owl stamp set with matching framelits that I got off the Sizzix clearance rack a while back when they were having a big sale.  I adore little owls anyways, and that little cute baby owl -- well, I just could not resist!!! Also featured: the 1 3/4", 1 1/4", and 7/8" scallop punches and the Itty Bitty punch pack to make the flowers -- you snip between the scallops to create the petals of the flowers.  For the edging, I used the Finishing Touches edgelits -- SO easy to use now with the magnetic platform!!!


If you've made it ALL the way to the end of this eternal post, congratulations!!!!!  Don't forget, the special this month is the bitty butterfly punch paired with the matching "Papillion Potpourie" stamp set -- a lovely combo that I reach for all the time -- I used the bitty butterfly and the larger butterfly punch on the first layout featured here.



Thursday, September 5, 2013

Folded shirt card

Happy Thursday!

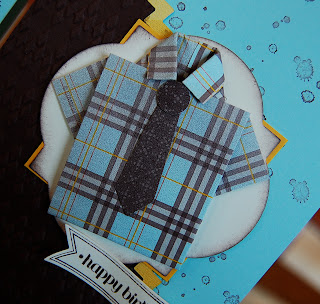
Today I have a quick post showcasing a "folded shirt card".  I'm using some papers from the new paper stack -- Sweater Weather -- from the Holiday catalog.  There are a lot of nice small patterns in this paper, which makes them well suited for this project.  To make the shirt, use a piece of designer paper 3 1/2 x 5".  For the pattern of how to fold the shirt, email me and I can send you the pdf.  I got this pattern off of splitcoaststampers ages ago, so no idea who to give credit to for it.  There are many versions out there for the folded shirt idea, so this is just one of many.

I used the Tasteful Trim XL die to make the diagonal trim on the card.  The script stamped on the left hand card is from the "By the Tide" stamp set.  The colors I used here are Pool Party and Chocolate Chip.  This is another card we are making at my upcoming masculine cards class for my monthly stampers hostess club.


 Below is the lineup of the three cards we are making at my class.  I generally have trouble coming up with masculine cards, so was pretty proud of these ones. :) 
Ok, I'm off to finish getting ready for my scrap booking retreat I'm going to this weekend.  Whoopeee!

Sunday, September 1, 2013

Black and White with a splash of Red!

Good Morning Crafty Friends!  Recently I went to a friend's SU card class, and she had a card layout design similar to this (I think she saw the idea on Pinterest, so I have no idea who to give credit to for the original layout design), and I immediately knew I wanted to try the same idea in black and white with a splash of red using my new Flower Shop set.  I also have been anxious to try using my new Expressions thinlits dies.  They might seem intimidating to use at first, but there are several tricks I've tried that make them pop out easily.  First, put wax paper between your die and the paper you're trying to cut, secondly, use a little card stock shim on top of your top cutting pad to make the sandwich a little tighter.  Thirdly, after you've cranked it through, roll it backwards back through the machine a second (or even third) time to make sure it has cut through well.  When you pull it out, you should see a little corner or two popping out -- get a grip on it and gently pull it out of the die -- or use a paper piercing tool to poke gently through the little holes on the back of the die to help your expression to pop out.  You can also put the multipurpous adhesive sheets on the back of your paper before cutting your work, so you can easily "peel and stick" your word.  A xyron sticker maker also works great.  Anyways, I can see myself using these a lot.  AND I love that the "love" word can be used for other stuff than just Valentines or anniversary -- would make a great title "love you" for a scrap book layout -- and the "thankful" word will be a great title "thankful for you" for a fall themed layout as well as thanksgiving cards or whatever.  Ok, on with the card...

I also broke out my finishing touches edgelits to edge the red cardstock.  I LOVE how easy these are to use now with the magnetic platform!  I'll admit, the edgelits used to make me so frustrated that they mostly just stayed on my shelf.  Now, I just pull out my magnetic platform and my paper doesn't slide anywhere when I go to cut.  SO AWESOME!!!!

Other products used on this card, are the Flower Shop stamp set and matching pansy punch, labels framelits, fancy fan embossing folder, basic pearls, Itty Bitty shapes punch pack, Polka Dots DSP pack, Real Red, Basic Black, and Whisper White card stock.

Happy Sunday to each of you!