Need a quick and CUTE little Valentine treat holder? Try this little milk carton! It's made with the Milk Carton Bigz Die. I did find that using the premium crease pad with an extra shim of one piece of card stock, helped to make the score lines MUCH easier to fold. (So, your Big Shot sandwich is: bottom cutting plate, die, card stock, premium crease pad, and card stock shim.) You do have to spend a bit of time with a bone folder, creasing all the score lines for your box to turn out the way you want it to... I wanted to add a little window to the front, to see the cute little candy hearts inside, so I used the Postage Stamp Punch to punch a little window in the side panel -- two panels over from the "side flap" on the box. I then attached a small piece of the clear acetate Window Sheets over the window, and finished assembling the box. Such a cute little finishing touch!
To hold the top closed, I punched one hole with the 1/8" round punch through all the layers at the top, as well as through the little tag I made, and put a black glitter brad through to hold it all together.
For the little tag, I stamped the little birds (from the "Love You Much" stamp set) in Real Red on a Whisper White card stock scrap, and then punched it out with the decorative label punch. I then stamped the birds again in black on some red designer paper from the Brights Designer series paper stack, and cut them out. I popped the little birds up on dimensionals. This technique is called "paper piecing" and is simple enough to do, and adds such a great little touch of flair.
Join me on Sat, Feb 4th at 6:30 pm and make yourself one of these adorable little milk carton boxes full of candy hearts!
AND,... don't forget! It's Sale-a-bration time! Get a FREE Sale-a-bration product with every $50 purchase!
Saturday, January 28, 2012
Friday, January 27, 2012
More scrap book pages -- aka border swaps!
Here is a little scrap booking inspiration for you! I have been loving the layout borders/page embellishments I have received in my scrap booking borders swap! Helps me keep up with my goal to get at least one 2 page, 12x12" scrap book page ensemble done each week. Look at these gorgeous borders and page elements. I am so happy my scrappy friend, Leah, twisted my arm into joining their swap. :)
Sparkling Hugs and Kisses
How cute is THIS idea!!! You cut a 1 1/2" strip of the red glimmer paper, and the silver glimmer paper (from the Holiday mini -- BUT still available to order! #124005), and Early Espresso card stock. Feed the strips into the Blossom Petals Builder Punch, lining up the edge of your strip with the pointed tip of the largest petal -- ta dah! you have a perfect kiss shape! I learned this cool trick on Lisa Young's blog, and thought is was so brilliant, just had to share! In the new set from the Occasions Mini -- "P.S. I love You", there is a stamp with "kiss you, miss you, love you" and I just cut them apart to make the strips coming out of the kisses. This is another card we will be making at my upcoming Valentine's class on Feb 4th.
Other fabulous products featured, are: the new Fashionable Hearts embosslit, the Adorning accents heart embossing folder, a strip of lovely black flocked paper from the Mocha Morning designer paper stack, and the Dotted Scalloped Ribbon Border punch for that little decorative strip of red. The card base is Basic Gray.
Are you getting into the Valentine's mood??? :)
Happy Creating!
Thursday, January 26, 2012
Love is in the air!
I recently purchased the new stamp set from the Occasions Mini, "P.S I Love You", and I've been anxious to "play" a little, so here you go! I wanted to make a masculine card, so I forced myself to leave the chocolate and pink alone, and reach for the cherry cobbler, black, and vanilla. It really is a striking combo, and achieved the look I was hoping to. I used a strip of Newsprint DSP along the bottom, sponged along the edges with cherry cobbler ink. I used the Lace ribbon punch to punch the lovely black border and wove a piece of vanilla 1/8" ribbon through some of the holes. Then, I added some rhinestones colored red with a Sharpie, for some bling. The punched shape for the sentiment at the lower right, is made with the Decorative Label punch. First, stamp the sentiment (from Teeny Tiny Wishes stamp set) on a scrap of vanilla card stock. Line up the sentiment toward the bottom of the punch and punch out. See the posting on this blog that has photos. :) of how to do create the next step. http://embellishedbybrenda.blogspot.com/2011/08/decorative-label-punch-alternate-use.html Just another super fun thing you can do with this punch!
I stamped more hearts on the background with cherry cobbler ink, and punched out the large hearts with the heart punch, and the "Love you" with the heart to heart punch. Of course, I added some Dazzling Diamonds glitter around the borders of the hearts to make them just a tad more special....
This card is one of the projects we will be making at my "Won't you be mine?" Valentine's class on Sat, Feb 4th, at 6:30. Please join us! Here are all the other projects we'll be making, too!
Tuesday, January 24, 2012
Time to Sale-a-brate!
It is indeed the most wonderful time of the Stampin' Up! year -- Sale-a-bration! Get a free stamp set, ribbon/brad pack, designer paper pack, embossing folder, or stamp set for FREE with a $50 order! Whoo Hoo!!! I love free stuff, and there are lots of lovelies to choose from this year. Some of my favorites so far, are the "Everyday Enchantment" designer series paper, the adorable brads assortment, and "Fresh Vintage" stamp set. Of course, I'm also excited about getting the embossing folders featured, as I don't have them yet -- amazing, huh! :)
I've been enjoying playing with the new Labels framelits a LOT!!! They are so versatile and add such an elegant touch to a project. Here is a super simple card featuring a new Sale-a-bration stamp set -- "Everyday Elegance", the new Labels framelits, and -- just for a fun twist -- I used my Concord Crush Classic ink pad, and rubbed ink all over the inside of the front of the Vintage Wallpaper embossing folder before running my folded Wisteria card stock through. It gives almost a vintage feel to the card.
A great advantage to the framelits, is that you can see where you are cutting -- so I stamped my sentiment and image on a scrap of white card stock, then used my framelit to cut it out exactly where I wanted to. Perfect!
Of course, I added some ruffled Wisteria ribbon and my favorite Basic Pearls at all the "intersections" to add that special touch. Seriously, this card was a "10 minutes or less" baby -- love those kind! :)
Enjoy! and be sure to check out all the AWESOME stuff in the Sale-a-bration catalog -- upper right corner of my blog.
Thursday, January 19, 2012
Winter is here!
Ready to scrap some winter pictures??? I think winter is here, finally! My Seattle friends have had more snow than we have so far this year...
This scrap book layout is for my Scrappers' Hostess Club that starts next month -- Feb 10th to be exact. AND there's still one spot in this club, so join us if you like. It meets every other month, with a $30 order commitment, on the 2nd Friday of the month at 6 pm. For all the details, visit my meetup group: http://www.meetup.com/Flathead-Valley-Stampers/.
The theme to these pages is: "Winter is..." -- different for each of us, I'm sure, but a few of my favorite journaling accents are: skiing, snuggles, smiles, santa, sledding, snowmen, snowball fights, scrap booking with friends, stamping Christmas cards, and.. the list goes on...
I've used the Everyday Enchantment designer series paper again here (FREE paper you can get during Sale-a-bration).
We will be learning two stamping techniques. First, Glitter window...
I first punched a 1 1/4" circle out of a scrap pc of cardstock. Then I lined up my designer paper strips and adhered them down with temporary adhesive, traced the outline of the circle where I wanted the punch out to be, then lifted up each strip and lined up the punch on the line I drew and punched in out. Next, I put both strips face down, lining up the circle halves, and put a pc of clear packing tape over the hole -- so the sticky side is facing to the front. Turn project sticky side up, and dump Dazzling Diamonds glitter over your sticky window, rubbing in the glitter a little so it sticks well. On a separate scrap of vanilla paper, I stamped a snowflake from the Serene Snowflakes stamp set in Poppy Parade ink and adhered that behind the window. I used a little Pool Party ruffled ribbon to hide my designer paper seam, and punched a Poppy Parade scalloped frame to go around my glitter window.
The second technique showcased here, is the emboss resist technique.
Take a scrap of vanilla card stock, and stamp the snow flake from "Winter Post" set in Versamark ink. Emboss with clear embossing powder and a heat gun. Apply Lucky Limeade ink using a stamping sponge all over embossed image. Use a paper towel to rub over image and wipe off any excess ink from the embossed image -- the snowflake image will "pop out" as the embossing resists the ink.
Of course, that beautiful doily is the new Doily die from the Occasions Mini. That little punched out postage stamp on the lower right corner is from the Free Sale-a-bration set -- Fresh Vintage. I also used the postage stamp punch to punch out the title letters after first stamping them in Poppy Parade ink on Vanilla card stock. I then mounted them on Pool Party embossed tags using the large tag punch. Whew! there are a lot of steps on these pages, I guess. More than I realized!...
I used the new Labels Framelits to cut the snowman photo and mats. They are so very versatile! I've been using them a lot already -- great for scrapbooking and card making, both.
Stay warm! and drive safely!
Saturday, January 14, 2012
3-D Stamping Technique
Here is the second card we will be making at my techniques class coming up on Jan 20th -- "3-D stamping" is the featured technique. First, to make the scallop shaped card base, I took a standard, A-2 sized Lucky Limeade card base -- adhered a 1" strip of designer paper from the "Everyday Enchantment" series (FREE paper you can get during Sale-a-bration) along the fold, then added a punched strip of Pool Party card stock (using the dotted scallop ribbon punch). I lined up the fold on the top edge of the Scallop #2 Bigz die, leaving a few scallops sticking off the top -- ran that through my Big Shot, creating a darling scalloped card.
Now, for the focal image -- I used my new Labels framelit dies (from the Occasions Mini catalog) to cut a Calypso Coral die cut. First, I stamped the flower image (from the "Fresh Vintage stamp set -- another free Sale-a-bration stamp set) in Poppy Parade ink. Next, I used my stamp-a-ma-jig to stamp this same image onto an imaging sheet. Then, I cleaned the stamp well, re-inked it in White craft ink, and used my stamp-a-ma-jig to align the image exactly where I wanted it (I wanted to stamp the white image slightly to the right and down just a tiny bit to give that 3-D effect). See this U-tube video my friend has done demonstrating how to use a stamp-a-ma-jig. http://www.youtube.com/watch?v=9NHIRdouV3k&feature=uploademail
This same technique can be done using a light ink (like Pool Party) on white card stock, then stamping the second image in a darker ink (like Old Olive) slightly to the side and down to make a shadowed like image --like this card:
Those adorable little brads shown at the bottom of the "label" panel, are also from a FREE pack you can get during Sale-a-bration. :) How I do love free stuff!
I added some of the basic pearls to make the images pop a little, as well.
Thursday, January 12, 2012
Emboss Resist meets "Mixed Bunch"
For my first techniques class (in a series of 5 classes), starting on Jan 20th, we are doing emboss resist and 3-D stamping techniques. Check my "Events Calendar" if you're interested in joining these classes.
This card features the emboss resist technique AND the brand new stamp set, "Mixed Bunch" with it's matching Blossom punch from the new Occasions mini.
I stamped the flowers in Versamark ink on Whisper White cardstock, then embossed them with clear embossing powder. Next, I sponged Pacific Point ink over the flower, which makes the white, clear embossed image stand out. Take a paper towel and rub over the embossing and remove any residual ink -- the embossing resists the ink, and only allows the non-embossed areas to be inked. I then punched out the flower, using the new Blossom punch, and layered it onto my card, using one of the polka dotted In Color brads, and a new brad from a pack of brads you can get for FREE during Sale-a-bration (which starts Jan 24th). Other fabulous products featured on these cards, are the Large Sizzlit Doily die, the Adorning Accents edgelits and their matching embossing folders, the tiny tag punch and stamp set, and the Blossom Petals punch (for the leaves). The new doily die takes a little effort to poke out all the extra parts, but the result is stunning and so worth the work! A couple of tips -- slightly roll your doily after you cut it out, and some of the chad will start to "pop" out. Use a lint roller to roll over it -- the extra pieces stick to the roller. AND, when all that fails, use your trusty paper piercer and park yourself in front of the trash can and poke away, being careful to only poke through the doily!
My color scheme here, is brighter than my usual fair -- I think I was longing for some color in my life right about now! -- Pacific Point, Lucky Limeade, and Riding Hood Red. It definitely would brighten one's day! :)
Happy Stamping -- and be sure to check out the new Occasions mini -- upper right hand corner. So many fabulous products to get inspired and excited about!
Supplies:
Card stock: Riding hood red, Pacific Point, Whisper White, Lucky Limeade
Ink: Riding hood Red, Pacific Point
Stamps: Mixed Bunch, Tiny Tags
Accessories: Blossom punch, Tiny tag punch, Riding Hood red taffeta ribbon (retired), Cherry Cobbler bakers twine, In Color polka dotted brads, Adorning Accents edgelits and embossing folders, Blossom Petals punch
Tuesday, January 3, 2012
My First ever "Border Swap"
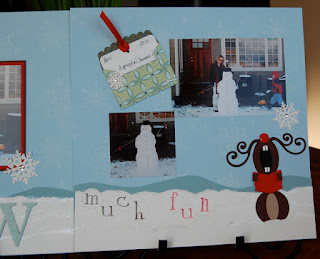
My VERY scrappy friend, Leah, invited me to join her and 2 of her crafty friends in a "border swap". We each create 4 of the following: a 3" border, at least one photo mount, and embellishments to complete a 2 pg layout. Once a month, we'll have a swap -- and come home with three, double page layouts, plus our own. I'm hoping this will give me a jump start in my overwhelming gallery of photos I have to scrap! I went ahead and put my layout together, with it's card stock backing, stamping, etc., because I wanted to take it along to show how I intended to finish the layouts. Here they are!
First I stamped the background 12x12" sheets of bashful blue cardstock, with Serene Snowflakes and white craft ink. To make the borders, I cut two strips of Baja Breeze card stock in a wavy pattern, then tore strips of white card stock and layered them on, overlapping each strip slightly. Then, I used my two-way glue pen and outlined each layer, then dumped Dazzling Diamonds glitter over -- so much sparkle!
For the SNOW letters, I adhered (retired) designer paper to chipboard, using the Big Shot Multipurpose adhesive sheets, then cut them out using the Serif Essentials Alphabet Bigz dies. To make the "snowball letters" on the other side, I stamped the letters in Early Espresso and Real Red on white cardstock, punched them out with a 1" punch, adhered them to the layout, and then added a little border of Dazzling Details glue around the outsides to make a glittery snow ball.
I wanted to add a journaling element, so I cut out a little envelope using the Scallop Envelope die, and then folded a little strip of white card stock with a red ribbon pull, and put it into the envelope as a "pull out tag" to journal on. I used the retired slit punch to make a "flap" to secure the folded tag.
The big snowflake is made using the Snowflake #2 die, layered Baja Breeze and Whisper white -- with three sparkly rhinestones in the center. The little snow flakes, are from the Norther Frost decorative strip die. They help tie the whole layout together, I think.
Last, but not least, that adorable singing reindeer in the lower right corner, is Jackie Topa's masterpc -- isn't he the cutest!!! You can learn all about him here: Jackie Topa's singing reindeer card
One final side shot for the road! Hope you feel inspired to try a little scrapping yourself!
Subscribe to:
Posts (Atom)